

Upgrading My BMW F30, F31: From 8.8-inch Display to a Massive 12.3-inch Navigation System (from Ugode)
Upgrading your car can significantly enhance the driving experience, and my recent journey with my BMW F30 is a perfect example. I recently made a notable upgrade from the standard 8.8-inch NBT navigation display to a stunning 12.3-inch screen. Here’s how this transformation elevated my driving experience.
HERE you can find 12.3 Ugode Screen for BMW 3, 4 Series: https://www.ugode.co.uk/products/for-bmw-3-4-series-f30-f34-f32-g20-android-screen-apple-carplay-navigation-car-stereo-gps?spm=..collection_0c3ff4f6-0e84-4eed-a623-dc0c3ac9f196.collection_detail_1.5&spm_prev=
You can find Digital Instrument Cluster for BMW 3-Series F30, F31, 4-Series F32, F33, F34, F36 HERE: https://s.click.aliexpress.com/e/_c4LPB8Ef
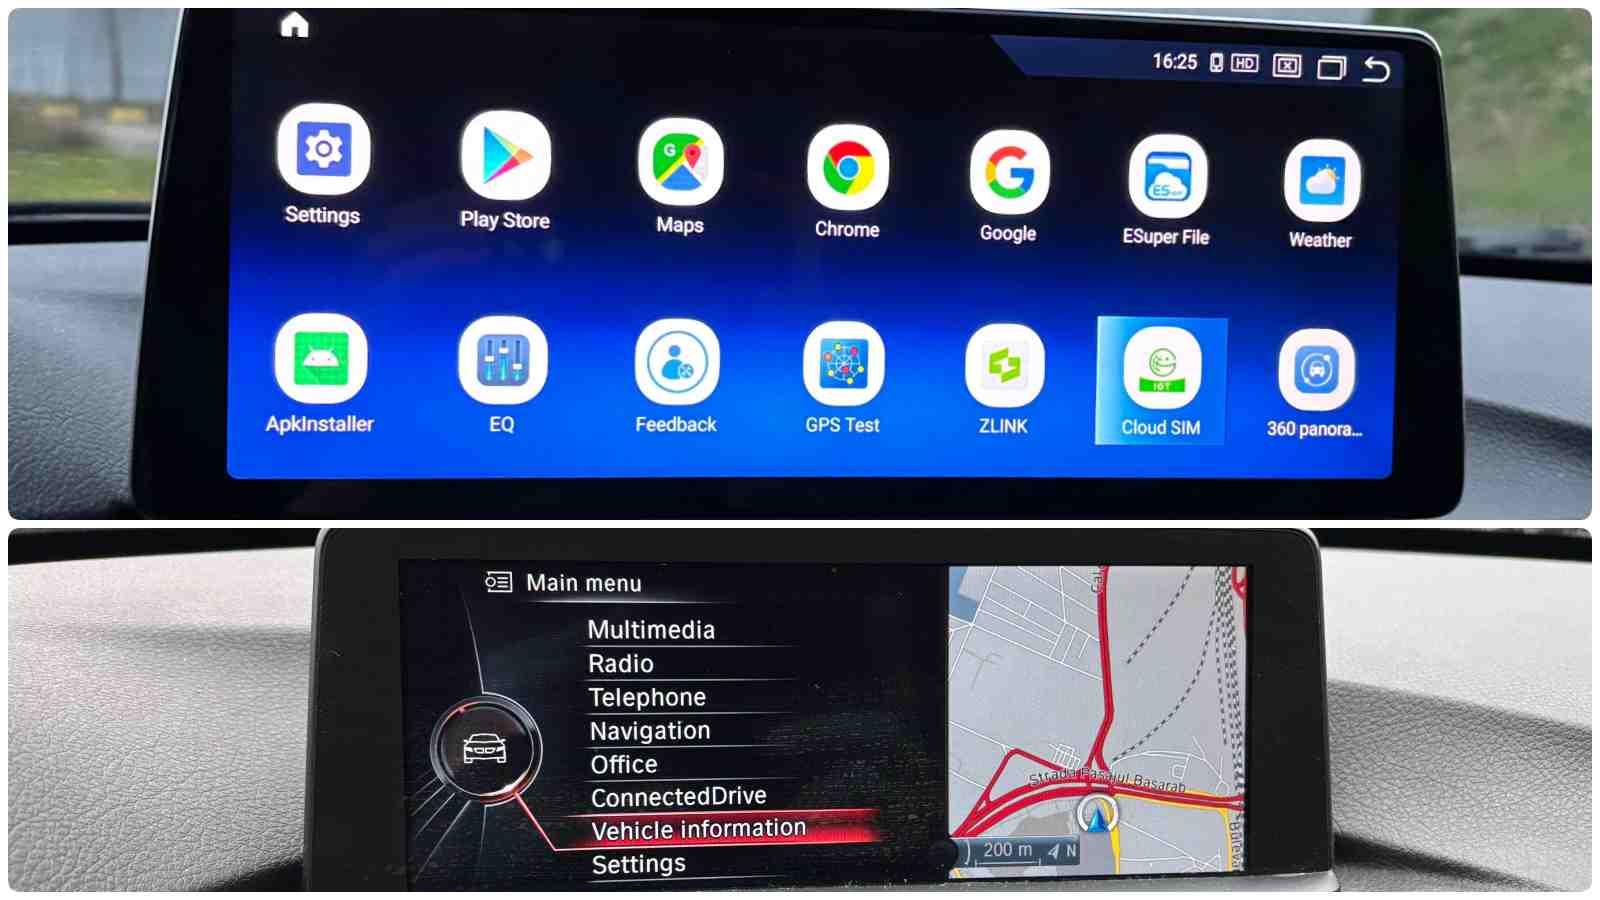
Here you can find one for you car model: https://www.ugode.co.uk/
HERE you can find BMW Store Genuine items: https://amzn.to/46fWZkM
The 8.8-inch display served me well for years, but as technology has evolved, so have our expectations. The demand for larger, clearer displays with advanced features led me to seek a bigger screen. The 12.3-inch navigation system not only provides a more modern look but also offers improved functionality and usability.
The installation process can be daunting for some, but with the right tools and resources, it’s manageable. I began by researching the best aftermarket options for the BMW F30. After choosing a compatible 12.3-inch unit, I gathered the necessary tools and followed detailed online guides.
Features of the New System
The upgrade was worth every effort! The 12.3-inch display offers a high-resolution screen with vibrant colors and improved visibility in sunlight. Some standout features include:
- Enhanced Navigation: Real-time traffic updates, more detailed maps, and easier zooming options make navigation effortless.
- Better Connectivity: The new unit supports Apple CarPlay and Android Auto, allowing seamless integration with my smartphone.
- Customization Options: With the larger screen, I can customize various settings and layouts to fit my preferences.
The Driving Experience
The upgrade not only enhances functionality but also elevates the overall driving experience. The larger screen is easier to read at a glance, reducing distractions while driving. Moreover, the advanced features of the new system make navigation more intuitive and enjoyable.
Conclusion
Upgrading to a 12.3-inch navigation system in my BMW 3-Series F30 was a game changer. It’s not just about aesthetics; the improved functionality and ease of use significantly enhance daily driving. For those considering a similar upgrade, I wholeheartedly recommend it—you won’t regret it!
Here is a video tutorial on how to install 12.3 inch Ugode Screen for BMW 3-Series F30 IN 18 EASY STEPS:
Required tools:
- Torx T20: https://amzn.to/49wdhuA
- Trim removal tool: https://amzn.to/4oWU3mt
- Carefully remove the dash trim using a trim removal tool. You can find Trim Removal Tool set below in the video description!
- Remove the hazard button and window lock button by pushing from the inside to the outside and disconnect its connector from the back.
- Unscrew the two bolts from the screen using a T20 Torx.
- Remove the screen by pulling it up.
- Disconnect the purple connector from the back by pressing the clip on the side.
- Remove the plastic cover at the bottom of the center console and disconnect the cables.
- Unscrew the two bolts from the Climatronic panel
- Unscrew the two bolts from the CD Player as well
- Install the plastic bracket and put the bolts back. I ran the cable with the USB ports through the inside of the dashboard and took it out to the glove compartment.
- Remove the CD player with the Climatronic panel outside and disconnect the plug
- Unscrew the 4 bolts from the CD player
- Remove the CD player outside and disconnect its power plug from the back
- Connect the plug from the new screen to the power plug from the car and then connect it to the CD player
- Reinstall the CD player and secure it with the bolts
- You can put the GPS and 4G antennas inside or outside the dashboard. All the cables that are then connected to the new screen must be taken put through the plastic bracket. Here are the cables that connect the 360-degree panoramic camera to the new screen.
- Connect all cables to the new 12.3 inch screen.
- Install the new screen on the plastic bracket.
- Reinstall all other part on the center console: the CD-Player and Climatronic buttons, the plastic cover (with the plug) at the bottom, all the bolts and the dashboard trim.
You can find Digital Cluster for any car model HERE: https://www.ugode.co.uk/collections/digital-cluster?spm=..index.header_1.1
This is the box that has inside a 12.3 inch screen.
You don’t have to add some extra installation, no need reprogramming or coding and cutting cables. It has dual system, OEM and Android, switch freely and Car information display.
Keep Car’s Original functions: Car information display, parking system, factory rear view camera , factory 360 camera, factory radio, GPS navigation, Bluetooth, USB and many more.
It is compatible with original iDrive Controller and steering wheel control. Integrates OEM car centric functions such as speed, fuel level, oil pressure and safety warnings. Support both original rear view camera and aftermarket rear view camera. Supports different navigation systems and maps such as Waze, Sygic, iGo, Google Maps and many other apps.
This android screen support HD 4K videos and also support Picture In Picture and Split screen. Multimedia can be shared with rear-seat passengers when the video output adapter is connected to the screen’s USB and rear-seat monitor’s.
Here is the Installation guide. This is the 12.3 inch android auto & apple CarPlay screen. Here you have the cables from the 360 degrees Panoramic cameras with Bird View!
These 4 cameras should be installed as follows: in the front grille of the car, next to the exterior trunk handle and on the two outside rearview mirrors. The camera connects very easily with those colored cables to the new 12.3 inch screen.
I will show you the installation of this camera in a future video.
Here you have the plastic bracket that holds the 12.3 inch screen. Here you have the aux cable. This is the Power cable. That cable has two USB ports. This is the GPS antenna. And this one is the 4G antenna. Here is the 12.3 inch screen, you have to connect the cables on the back. It looks very nice, it’s slim and has a good quality.
I ran the USB cable through the inside of the dashboard and took it out into the glove compartment.
Don’t forget to like & subscribe on YouTube channel, Tutoriale Auto!